There’s nothing more frustrating than pulling a perfectly roasted batch of veggies or crispy chicken from the oven, only to find half of it stubbornly clinging to the sheet pan. Whether you’re a seasoned home cook or just starting your culinary journey, the mystery of why food sticks to your baking sheets can turn a delicious meal into a sticky, smoky mess. But don’t toss that pan just yet! In this article, we’ll unravel the common causes behind stubborn sticky food and share practical tips to keep your meals sliding effortlessly off the sheet pan-making cleanup easier and your dishes even more delightful. Ready to say goodbye to stuck-on food forever? Let’s dive in!
Understanding the Science Behind Food Sticking on Sheet Pans
Why Is My Food Sticking to the Sheet Pan? has puzzled home cooks and professionals alike for decades. The truth lies in a delicate dance between heat, moisture, and surface texture. When food cooks, proteins and sugars undergo the Maillard reaction, forming a fond that can adhere to the pan if the surface isn’t properly prepared. Additionally, moisture released during cooking can create steam pockets that cause sticking. Recognizing this science empowers you to take control and create perfect, nonstick outcomes every time.
Choosing the Right Sheet Pan Material for Your Cooking Needs
Not all sheet pans are created equal. Material makes a world of difference for heat conduction and sticking tendencies. Aluminum sheet pans heat quickly and evenly but often lack a nonstick finish, which means prep is critical. Conversely, stainless steel pans are durable but can be notorious for food adhesion without proper seasoning. Nonstick-coated pans help minimize sticking but may degrade with high heat or metal utensils. For roasting vegetables or baking delicate cookies, a heavy-gauge aluminum pan with a brushed or anodized surface strikes an excellent balance between heat and stick resistance.
Essential Prep Tips to Prevent Food from Sticking Every Time
Successful cooking starts long before the food hits the sheet pan. First, always ensure the pan is clean and dry-residual fats or debris create uneven spots where food can cling. Next, apply a thin, even layer of fat such as olive oil, melted butter, or nonstick spray to form a barrier between food and metal. For sticky foods like marinated meats or dough, consider laying down parchment paper or a silicone baking mat to further prevent adhesion. Heating the pan slightly before adding food helps proteins sear instantly, creating a natural release layer. Lastly, avoid overcrowding the pan, which traps steam and promotes sticking instead of browning.
Smart Seasoning and Cleaning Practices to Keep Your Pan Nonstick
Seasoning your sheet pan isn’t just for cast iron skillets-it’s an underrated method for extending nonstick properties in many metal pans. After thorough cleaning, lightly coat the surface with a high-smoke-point oil and bake at moderate heat for 1 hour. This polymerizes the oil, creating a resilient, shiny seasoning layer that wards off adhesion. Post-cooking, gently clean with warm water and a soft sponge, avoiding abrasive scrubbers that strip seasoning or damage nonstick coatings. Dry immediately to prevent rust, and re-season periodically to maintain a slick surface. Using vinegar or baking soda solutions can help remove stubborn buildup without harsh chemicals.
Prep and Cook Time
- Prep Time: 10 minutes
- Cook Time: Varies depending on recipe (15-45 minutes)
Yield
Serves 4-6, adaptable based on recipe portioning.
Difficulty Level
Easy to Medium – requires attention to detail but simple techniques.
Ingredients
- 1 sheet pan (aluminum or anodized preferred)
- 2 tbsp olive oil or melted butter (for prepping pan)
- Optional: parchment paper or silicone baking mat
- Varies by recipe: proteins, vegetables, or baked goods of choice
Instructions
- Start with a clean, dry sheet pan. To remove residual grease or particles, wipe the surface with a paper towel soaked in vinegar and dry thoroughly.
- Preheat your oven according to your recipe’s instructions and place the pan inside for a few minutes to warm slightly.
- Remove the pan carefully from the oven and brush or spray it with a thin, even coat of olive oil or melted butter.
- If desired, lay down a sheet of parchment paper or a silicone baking mat for additional nonstick protection.
- Arrange your food evenly in a single layer, ensuring sufficient space for air circulation.
- Cook according to recipe times, turning or stirring items as directed to promote even browning and prevent sticking.
- After cooking, allow the pan to cool slightly before cleaning to preserve seasoning.
- Clean the pan gently using warm water and a soft cloth or sponge. Avoid harsh soaps or scrubbing pads that damage the surface.
- Dry the pan completely; if you notice a dull surface, consider re-seasoning by applying a thin oil coating and heating in the oven for 1 hour at 350°F (175°C).
Tips for Success
- For sticky proteins like chicken or salmon, marinate with a little oil to reduce adhesion.
- Use a fish spatula or silicone tool for turning delicate foods to prevent tearing or sticking.
- If fond develops but you want to avoid scraping, deglaze the pan with a splash of stock or wine while still warm.
- Store sheet pans in a dry environment to prevent rust, especially aluminum pans without a nonstick surface.
- Regularly inspect your pan’s surface and replace if the coating becomes heavily scratched or peeled.
Serving Suggestions
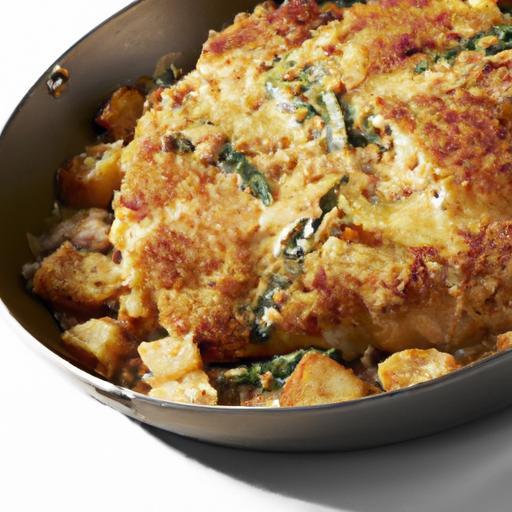
Serve your perfectly roasted or baked creations straight off the sheet pan to preserve their crisp textures. Garnish roasted vegetables with fresh herbs like thyme or rosemary and a sprinkle of flaky sea salt. For sheet pan roasted chicken, finish with a squeeze of lemon and a drizzle of extra virgin olive oil. Present baked goods with a dusting of powdered sugar or a glaze for visual impact. The beauty of sheet pan cooking lies in its effortless, rustic charm-embrace colorful plating and vibrant accompaniments for a meal that feels as joyful as it tastes.
| Nutrient | Amount (per serving) |
|---|---|
| Calories | 250-400 (varies by recipe) |
| Protein | 15-30g |
| Carbohydrates | 10-40g |
| Fat | 8-20g |
Explore more tips on preventing sticking issues here
For additional scientific insights about cooking pan materials, visit Serious Eats’ food science section.

Q&A
Q: Why does my food keep sticking to the sheet pan no matter what I do?
A: Ah, the notorious clingy food! Food sticks when the natural sugars, proteins, or starches bond too tightly with the surface of the pan, especially if the pan is uncoated or unevenly heated. Without a proper layer of fat, seasoning, or non-stick barrier, your delicious meal becomes a sticky situation.
Q: Is it the pan’s fault or my technique?
A: It’s a little of both-think of it as a kitchen chemistry dance. Old, scratched pans or bare metal surfaces love to grip by nature. But technique plays a huge role: not preheating your pan, skipping oil, overcrowding ingredients, or flipping food too soon can all increase stickiness.
Q: How can I prevent food from sticking to my sheet pan?
A: Several tricks can save the day! Start by lining your pan with parchment paper or a silicone baking mat for a trusty non-stick surface. Lightly oiling the pan or tossing your food in oil creates a slick barrier. Also, preheat your sheet pan in the oven-hot surfaces help food release more easily. Last but not least, give your ingredients room to breathe and resist the urge to move them too early.
Q: Do different foods require different approaches?
A: Absolutely! Sticky situations vary-caramelizing sugary foods like roasted carrots might need just the right amount of oil and patience, while proteins like chicken benefit from a hot, oiled pan and proper resting before flipping. Delicate veggies might prefer gentler heat and a non-stick layer to keep their form intact.
Q: Can I make my old sheet pan less sticky without buying a new one?
A: Yes! Give it a little TLC by seasoning the pan, much like cast iron. Rub a thin layer of high-smoke-point oil over the clean, dry pan, then bake it at 400°F for about an hour. This creates a natural, polymerized coating that discourages sticking. Just remember to care for your pan by cleaning it gently and drying it well.
Q: What if my food still sticks despite all my efforts?
A: Don’t despair! Use a thin, flexible spatula to gently coax your food off the pan once it has had a chance to rest and cool slightly-this is key, especially with roasted items. If it’s stubborn, a quick splash of warm water can sometimes loosen things up, but be cautious with sudden temperature changes on hot pans.
Q: Are non-stick sheet pans worth it?
A: They can be a game-changer for stick-prone foods and save you time on cleanup. However, they require gentle use-avoid metal utensils and harsh scrubbing to preserve that slick surface. Ultimately, whether you prefer traditional or non-stick pans depends on your cooking style and patience for maintenance.
Keep these tips in your culinary toolkit, and soon you’ll wave goodbye to stuck-on food and hello to effortless sheet pan mastery!
Insights and Conclusions
In the grand culinary adventure, a sticky sheet pan can feel like an unexpected plot twist-but now, armed with these tips and tricks, you’re ready to turn the page to a hassle-free cooking chapter. From the right oils to proper heat and preparation, mastering the art of non-stick sheet pan cooking is just a few steps away. So next time you hear that sizzle, don’t dread the scrape-embrace the process, and let your meals slide off with ease and flavor intact. Happy cooking!


