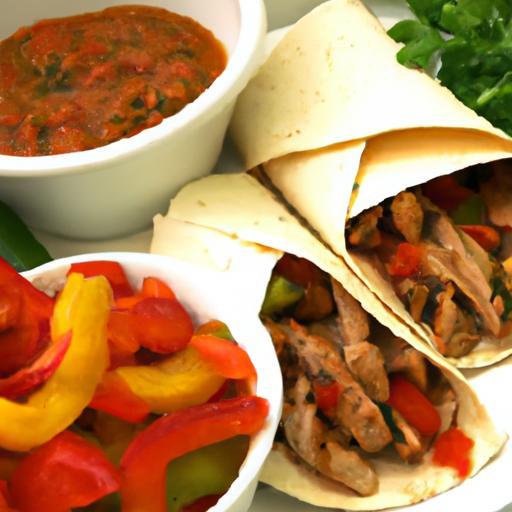
There’s something magical about the sizzle of peppers and onions mingling with tender, seasoned chicken-an aroma that promises a fiesta on your plate. But between busy days and unexpected plans, finding time to whip up a vibrant, homemade meal can feel like a challenge. Enter the genius of Freeze & Savor: Easy Homemade Chicken Fajita Kits, your ticket to quick, flavorful dinners without the hassle. These kits are not just about convenience-they’re about capturing freshness, bold flavors, and the joy of assembling your own fajitas anytime you crave. Ready to transform your kitchen into a tantalizing Tex-Mex haven with just a few simple steps? Let’s dive into how these make-ahead kits bring vibrant meals and effortless cooking to your table.
Freeze & Savor: Easy Homemade Chicken Fajita Kits bring the vibrant flavors of Tex-Mex cuisine right into your kitchen while allowing you the convenience to prepare ahead and enjoy fresh, sizzling fajitas anytime. Drawing inspiration from classic street-style fajitas, these kits are crafted to capture the perfect balance of smoky, tangy, and savory notes that will have your family and friends craving more.
Prep and Cook Time
Prep Time: 20 minutes
Cook Time: 15 minutes
Freezing Time: 6 hours minimum
Yield
Serves 4 generous portions
Difficulty Level
Easy – Perfect for beginner and busy cooks looking to meal prep with style
Ingredients
- 1 lb boneless, skinless chicken breasts, thinly sliced
- 2 medium bell peppers (preferably one red, one green), thinly sliced
- 1 large yellow onion, thinly sliced
- 2 tbsp olive oil
- 2 cloves garlic, minced
- 1 tbsp chili powder
- 1 tsp ground cumin
- 1 tsp smoked paprika
- ½ tsp dried oregano
- ½ tsp salt (adjust to taste)
- ¼ tsp freshly ground black pepper
- Juice of 1 lime
- 8 small flour tortillas (6-inch size), warmed
- Fresh cilantro (for garnish)
- Optional: sliced avocado, sour cream, shredded cheese, salsa
Instructions
- Prepare the chicken marinade: In a large bowl, combine olive oil, minced garlic, chili powder, cumin, smoked paprika, oregano, salt, pepper, and lime juice. Whisk together until well blended.
- Marinate the chicken: Add the thinly sliced chicken breasts to the marinade and coat evenly. Let it sit for at least 15 minutes to absorb the rich spices.
- Sauté the vegetables: Heat a large skillet over medium heat. Add a splash of olive oil and cook the sliced bell peppers and onions until they are tender-crisp and caramelized, about 7 minutes. Stir occasionally to prevent burning.
- Cook the chicken: In the same skillet, push the vegetables aside and add the marinated chicken. Sauté for about 8 minutes or until fully cooked and juices run clear. Mix veggies and chicken gently to combine flavors.
- Assemble your fajita kits: Divide the cooked chicken and vegetable mixture evenly into four freezer-safe zip-lock bags or containers. Include the warmed tortillas wrapped tightly in aluminum foil, ready to be frozen along with the filling.
- Freeze: Lay the bags flat to save space and freeze for a minimum of 6 hours, ideally overnight, so the flavors meld beautifully.
- To cook from frozen: Remove the chicken fajita kit from the freezer, thaw overnight in the refrigerator, then reheat filling in a skillet over medium heat for 6-8 minutes, stirring occasionally. Warm tortillas in a dry pan or microwave before serving.
Chef’s Notes
- For a smoky, char-grilled flavor, try grilling the marinated chicken and vegetables instead of sautéing.
- Swap chicken for sliced steak or shrimp to customize your kits.
- For gluten-free options, substitute flour tortillas with corn or lettuce wraps (source).
- Make larger batches and freeze portions separately for quick weeknight meals.
- Keep tortillas separate from filling when freezing to prevent sogginess.
- Add a splash of water or chicken broth when reheating to keep the filling moist.
Creative Serving Suggestions
Serve your homemade fajitas with a vibrant color palette to elevate your dining experience. Alongside the steaming, peppery chicken mixture, present a trio of dipping sauces-creamy sour cream, zesty salsa verde, and smoky chipotle mayo-to excite taste buds.
Top with freshly chopped cilantro, a squeeze of lime for zing, and sliced avocado for creaminess. Add a sprinkle of cotija or sharp cheddar cheese for a melty finish. For a crunchy contrast, offer pickled jalapeños or a crisp radish slaw on the side.
Transform your fajitas into a salad bowl by layering the chicken and veggies over fresh greens, garnished with black beans and corn for a nutritious twist.

| Nutrient | Per Serving |
|---|---|
| Calories | 350 kcal |
| Protein | 35 g |
| Carbohydrates | 25 g |
| Fat | 10 g |
For more delicious Tex-Mex inspiration, check out our Easy Homemade Beef Tacos recipe, a perfect companion to your fajita feast.
Q&A
Q&A: Freeze & Savor – Easy Homemade Chicken Fajita Kits
Q1: What makes these homemade chicken fajita kits different from store-bought ones?
A1: Unlike pre-packaged kits loaded with preservatives and artificial flavors, these homemade fajita kits are made with fresh, wholesome ingredients. You control every spice, every slice of pepper, and every tender piece of chicken, making the flavors vibrant and truly your own. Plus, they’re designed to be freezer-friendly, so you can prepare in advance and enjoy later without compromising taste or texture.
Q2: How do I assemble the chicken fajita kits before freezing?
A2: Start by marinating sliced chicken breast in a lively blend of chili powder, cumin, garlic, lime juice, and a dash of olive oil. Then, layer it alongside pre-sliced bell peppers and onions in freezer-safe bags or containers. Don’t forget to toss in a small pouch of your homemade fajita seasoning mix – it’s the secret to that fiesta flavor that awakens your taste buds after a quick thaw and sizzle.
Q3: How long can I store these fajita kits in the freezer?
A3: For best flavor and quality, aim to use your chicken fajita kits within 3 months. The chicken stays juicy and flavorful, and the veggies maintain a satisfying crunch when cooked fresh from frozen or thawed overnight in the fridge.
Q4: What’s the easiest way to cook these kits once frozen?
A4: Sauté the contents straight from the freezer in a hot skillet. Start with a splash of olive oil and cook the chicken and veggie mixture over medium-high heat, stirring frequently. It usually takes about 10-15 minutes for everything to cook through and develop that irresistible sear. Serve immediately with warm tortillas, fresh salsa, and your favorite toppings.
Q5: Can I customize these kits for different dietary preferences?
A5: Absolutely! Swap chicken for shrimp, tofu, or even portobello mushrooms for a vegetarian twist. Adjust the spice level by adding extra cayenne or mild paprika, depending on your heat tolerance. The beauty of homemade kits is the freedom to tailor every element to your cravings and dietary needs.
Q6: What are some fun serving ideas to pair with these fajita kits?
A6: Keep it classic with guacamole, sour cream, and shredded cheese, or add a refreshing crunch with a cabbage slaw dressed in lime and cilantro. For a twist, try wrapping the fajitas in lettuce leaves or stuffing them into crispy taco shells. Don’t forget a side of Mexican rice or black beans to complete your vibrant, flavorful feast!
Q7: Why should busy cooks embrace frozen meal kits like these?
A7: Homemade frozen kits are a game changer for anyone juggling a hectic schedule but craving real, satisfying meals. They reduce last-minute prep time, minimize food waste, and give you control over nutrition and flavor. Plus, there’s something deeply rewarding about freezing a batch of love and convenience, ready to be savored on any night of the week.
The Conclusion
As you tuck away your homemade chicken fajita kits in the freezer, you’re not just storing meals-you’re preserving moments of vibrant flavor and effortless joy. With these kits ready to thaw and sizzle whenever the craving hits, dinner transforms from a rushed chore into a colorful fiesta waiting to unfold. So go ahead, freeze and savor the simplicity, the spice, and the satisfaction of fajitas made on your terms-because great meals don’t always have to mean great effort. Your future self will thank you, one delicious bite at a time.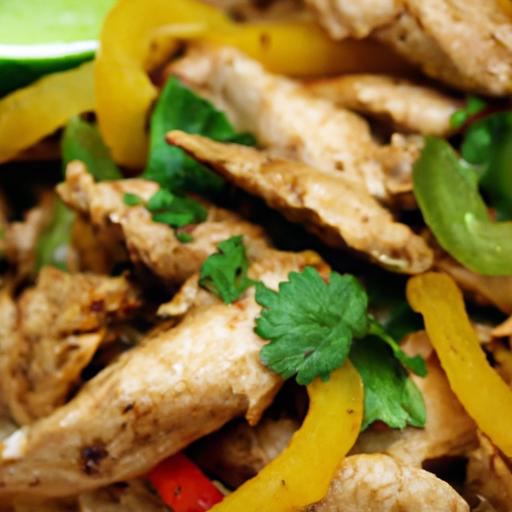


