In the world of meal prep, freshness is everything. There’s nothing quite as disheartening as peeling back the lid of a perfectly portioned container to find soggy greens or steamed veggies swimming in unwanted condensation. That unwelcome moisture not only compromises texture and flavor but also shortens the life of your carefully crafted meals. But fear not-keeping your meal prep fresh and crisp doesn’t have to be a culinary mystery. With a few simple, smart strategies, you can defeat condensation and enjoy every bite just as you intended. Let’s dive into the science and savvy tips that will transform your meal prep game, ensuring freshness that lasts from fridge to fork.
Keep Meal Prep Fresh: Smart Tips to Avoid Condensation
Understanding why condensation forms inside your meal prep containers is key to maintaining vibrant, fresh dishes that look and taste as good as the moment you made them. Condensation occurs when warm food releases steam that cools and collects inside airtight containers, turning crisp veggies soggy and vibrant sauces watery. By mastering simple science-backed techniques, you can keep your meals fresh and inviting all week long.
Prep and Cook Time
- Preparation: 15 minutes
- Cooling & Storage: 30 minutes
- Total Time: 45 minutes
Yield
4 well-portioned meal prep containers
Difficulty Level
Easy to Medium
Ingredients
- 4 sturdy meal prep containers (preferably BPA-free plastic or glass with vented lids)
- Paper towels or breathable cloths for lining
- Cooked grains (e.g., 2 cups cooked quinoa or brown rice, cooled)
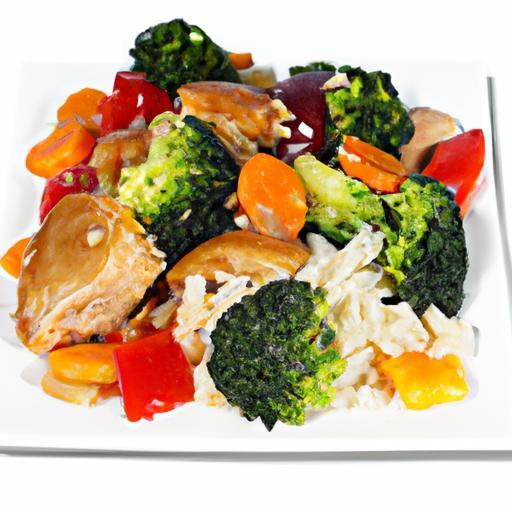
- Roasted or steamed vegetables (3 cups, cooled to room temperature)
- Proteins (4 servings, cooled to room temperature)
- Fresh herbs and lemon wedges for garnish, optional
- Silicone dividers or small containers for sauces/dressings
Instructions
- Choose the right container: Select containers with vented lids to allow moisture escape, or glass containers that handle temperature shifts without warping. Avoid fully airtight containers if your food is still warm.
- Cool food properly: Spread cooked ingredients on a baking sheet or shallow tray to cool evenly and quickly at room temperature before packing.
- Line containers with paper towels: Place an absorbent paper towel or breathable cloth at the bottom and top of each container to absorb excess moisture, cutting down on condensation buildup.
- Smart layering: Layer grains first, then proteins, followed by vegetables to create a moisture barrier between components. Keep sauces or dressings in separate small containers.
- Seal with care: Close the containers with their lids slightly ajar to vent residual steam if the food is not fully cooled, or seal tightly once food reaches room temperature.
- Store correctly: Refrigerate containers uncovered for 10-15 minutes before fully sealing and stacking, allowing any remaining steam to escape safely.
- Reheat wisely: When it’s time to eat, remove lids halfway through microwaving to allow steam to vent and prevent soggy textures.
Tips for Success
- Use vented lids: Containers with built-in vents encourage airflow and prevent moisture buildup while maintaining freshness.
- Cool food quickly: Hot food is the main cause of condensation. Use shallow pans or chill portions in the fridge uncovered (briefly) before storing.
- Layer moisture-prone ingredients on top: Place leafy greens or fresh herbs above firmer, cooked components to protect them from steam.
- Swap sauces for dry spices: Adding dressings just before eating keeps textures crisp.
- Rotate paper towels: Change absorbent liners every day to maintain dryness.
- Invest in silicone separators: These prevent pooling of moisture between ingredients, preserving texture.
Serving Suggestions
Present your prepared meals with a sprinkle of fresh chopped herbs like parsley or cilantro, and a bright wedge of lemon to balance flavors. Add a drizzle of extra virgin olive oil or a spoonful of crunchy nuts to keep textures lively. Offering sauces on the side gives control at mealtime and bypasses condensation issues altogether. Use colorful, clear containers so the vibrant layers entice you to enjoy every bite fresh.
| Nutrient | Per Serving |
|---|---|
| Calories | 350 kcal |
| Protein | 25 g |
| Carbohydrates | 40 g |
| Fat | 10 g |
For more inspiration on meal prep container options, visit Consumer Reports’ Meal Prep Container Guide. Also, check out our related post on essential tools for flawless meal prep to upgrade your kitchen routine.

Q&A
Q&A: Keep Meal Prep Fresh – Smart Tips to Avoid Condensation
Q1: Why does condensation form in meal prep containers?
A1: Condensation happens when warm, moist air inside the container cools down, causing water droplets to form on the inside surfaces. This often occurs if food is packed while still warm or if containers aren’t properly ventilated, leading to soggy meals and faster spoilage.
Q2: How can I prevent condensation when packing my meals?
A2: The secret lies in cooling your food to room temperature before sealing it. Give hot dishes a little breathing room by letting them rest outside the fridge for 20-30 minutes. Also, consider containers with air vents or peel-back lids to let steam escape and avoid trapped moisture.
Q3: Are certain containers better at preventing condensation?
A3: Absolutely! Glass containers with tight-fitting, vented lids are your best friends. They offer a sturdy seal while letting excess steam escape. BPA-free plastic containers with snap-open vents work well too, and silicone lids can provide slight airflow without sacrificing freshness.
Q4: Can adding absorbent materials help with condensation?
A4: Yes! Placing a small piece of paper towel under or over your food inside the container can soak up excess moisture, keeping meals crisp and appetizing. Just remember to replace the paper towel daily if you’re storing meals for multiple days.
Q5: Does layering food differently reduce moisture buildup?
A5: Layering makes a big difference! Put drier items like grains or leafy greens at the bottom, and juicier components like tomatoes or sauces on top or in separate compartments. This spatial separation limits contact with water, cutting down on sogginess and condensation.
Q6: Any tips for reheating meals without condensation ruining the texture?
A6: To keep your meal’s texture intact during reheating, remove the lid partially or vent the container to let steam escape. Microwaving food still sealed traps moisture, causing excess condensation and that dreaded soggy effect.
Q7: What about meal prep on the go-can condensation be avoided during transport?
A7: Transporting meals can be tricky! Use insulating bags with compartments or pack ice packs nearby to keep food cool and reduce temperature swings that create condensation. Avoid tightly sealing containers immediately after cooking-let your meal cool first, then seal and pack.
Condensation might be sneaky, but with these smart tips, your meal preps can stay fresh, tasty, and perfectly textured-ready to fuel your busy days without soggy surprises!
Wrapping Up
In the quest to keep your meal prep as fresh as your first bite, mastering the art of avoiding condensation is key. With these smart tips in your kitchen arsenal, you can say goodbye to soggy salads and damp snacks, and hello to flavorful, crisp meals every time. Remember, a little attention to how you store and pack your food goes a long way in preserving freshness and delighting your taste buds throughout the week. So go ahead-prep smart, pack tight, and keep those condensation woes at bay, turning meal time into a consistently delicious experience.


