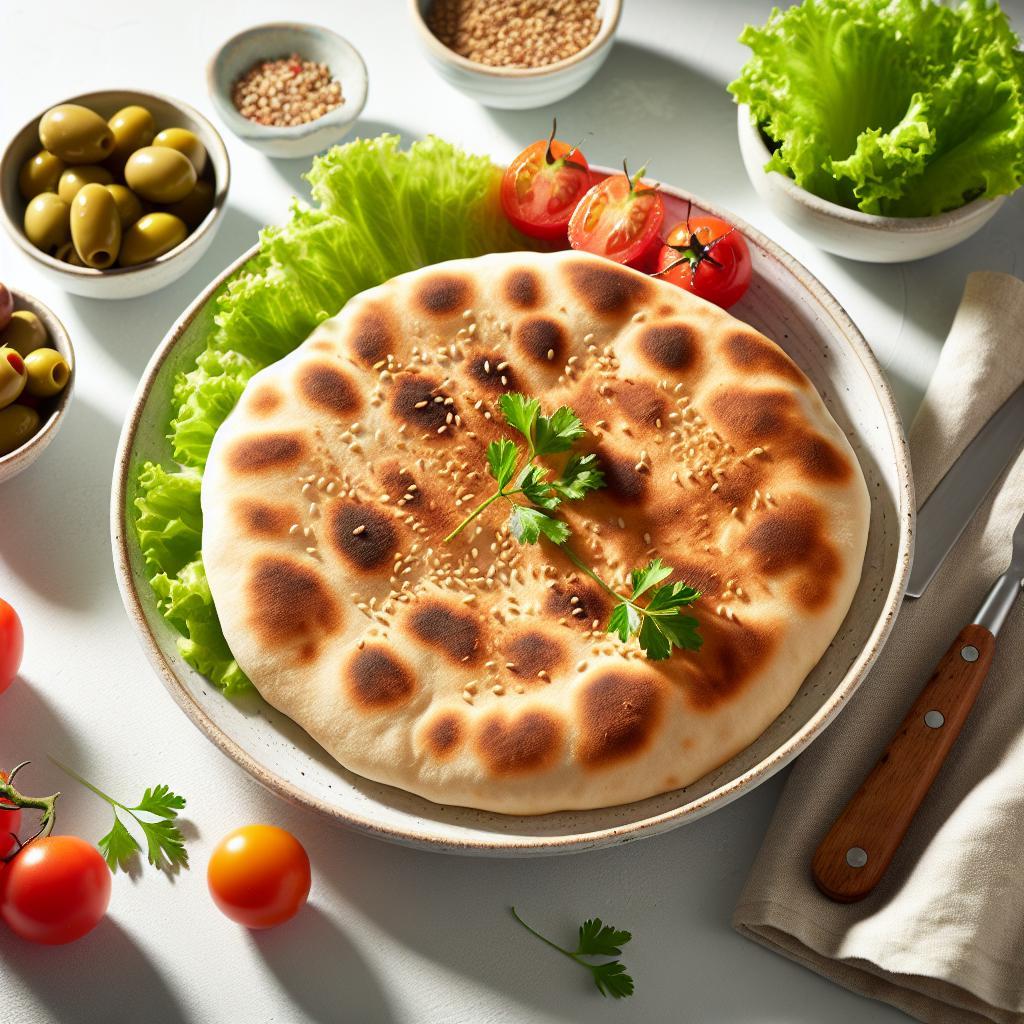
There’s something truly magical about fresh, homemade pita bread-the way it puffs up in the oven, revealing that signature pocket just waiting to be filled with your favorite ingredients. Perfect homemade pita bread isn’t just a delicious staple; it’s an invitation to explore authentic flavors and timeless baking traditions right in your own kitchen. Whether you’re a seasoned baker or a curious beginner, this simple, authentic recipe will guide you through the art of creating soft, chewy, and irresistibly fresh pita bread that elevates every meal. Get ready to roll up your sleeves and discover the joy of baking a Middle Eastern classic that’s as versatile as it is satisfying.
Perfect homemade pita bread captures the essence of Middle Eastern cuisine in a soft, fluffy pocket that’s both versatile and utterly delightful. This simple, authentic recipe offers a hands-on journey, turning basic pantry staples into an irresistible bread staple that instantly elevates any meal. Whether you’re dipping into hummus or crafting a loaded shawarma wrap, the joy of freshly baked pita comes from its delicate balance of texture and airiness – a result of meticulous ingredient selection, patient dough mastering, and careful shaping and baking.
Prep and Cook Time
- Preparation: 20 minutes
- Rising: 1 hour
- Baking: 5-7 minutes
- Total Time: Approximately 1 hour 30 minutes
Yield
8 pita pockets (about 6 inches in diameter)
Difficulty Level
Medium – With some patience and a few tips, even beginners can achieve bakery-quality results.
Ingredients
- 2 cups all-purpose flour, sifted (you can substitute up to half with whole wheat for nuttiness)
- 1 cup warm water (around 110°F)
- 1 tsp active dry yeast
- 1 tsp granulated sugar (feeds the yeast for a better rise)
- 1 tsp fine sea salt
- 2 tbsp extra virgin olive oil (for tender crumb and flavor)
- Additional flour for dusting and rolling
Instructions
- Activate the yeast: In a small bowl, combine warm water, sugar, and yeast. Stir gently and let sit for 5-7 minutes until frothy. This ensures the yeast is alive and ready to work its magic.
- Mix dry ingredients: In a large bowl, whisk the sifted flour and salt together to distribute evenly.
- Combine and knead: Gradually pour the yeast mixture and olive oil into the flour. Stir with a wooden spoon until a rough dough forms. Transfer to a floured surface and knead for 8-10 minutes until smooth and elastic. If the dough is sticky, dust with small amounts of flour – but keep it soft for fluffiness.
- First rise: Lightly coat a clean bowl with olive oil. Place the dough inside, cover with a damp cloth or plastic wrap, and let it rise in a warm spot for 1 hour or until doubled in size.
- Divide and shape: Punch down the dough gently to release air. Divide into 8 equal portions and shape each into a smooth ball. Cover with a cloth and allow rest for 10 minutes – this relaxes the gluten and makes rolling easier.
- Roll out the pitas: On a lightly floured surface, roll each ball into a circle about 6 inches in diameter and roughly 1/4 inch thick. Try to keep thickness even to ensure uniform puffing.
- Bake on hot surface: Heat a cast-iron skillet or a heavy-bottomed pan on medium-high heat. Place one rolled dough circle into the dry, hot skillet. Cook for about 1-2 minutes or until bubbles form and the underside has golden spots. Flip and cook the other side for another 1-2 minutes. The dough will puff up, forming the iconic pocket. Remove and wrap in a clean kitchen towel to keep soft.
- Repeat: Continue with remaining dough circles, ensuring the pan is hot enough for each batch to puff properly. Avoid overcrowding the pan to maintain heat consistency.
Tips for Success
- Flour selection: High-protein, bread flour produces chewier pitas, while all-purpose flour creates a softer crumb. Experiment for your favorite texture.
- Water temperature: Keep it warm but not hot; above 120°F can kill the yeast, resulting in poor rise.
- Resting time: Don’t rush the rising and resting phases – they’re key to an airy, tender pita.
- Baking surface: A well-heated heavy skillet mimics the traditional stone oven, crucial for that quick steam puff that forms a pocket.
- Make-ahead tip: Store baked pitas in an airtight container for up to 2 days, or freeze them individually wrapped for up to 1 month.
Creative Serving Suggestions
Enjoy your homemade pita bread by slicing it open to reveal the warm, pillowy pocket inside. Fill with grilled chicken kebabs, falafel, or roasted vegetables tossed in tahini sauce. For breakfast, stuff with scrambled eggs, feta, and fresh herbs. Dip warm pitas into smoky baba ganoush or creamy tzatziki for simple elegance. Garnish plates with a sprinkle of za’atar and a drizzle of olive oil for an authentic touch. The versatility of homemade pita encourages culinary creativity – let it inspire your next flavor adventure.
| Nutrient | Per Pita (approx.) |
|---|---|
| Calories | 150 |
| Protein | 5g |
| Carbohydrates | 28g |
| Fat | 3g |

For an extended dive into Middle Eastern bread traditions, check out our Guide to Middle Eastern Flatbreads. You can also explore the science behind yeast and gluten development from expert insights at King Arthur Baking.
Q&A
Q&A: Perfect Homemade Pita Bread – A Simple, Authentic Recipe
Q1: What makes this pita bread recipe truly authentic?
A1: The authenticity comes from using basic, wholesome ingredients like flour, yeast, water, and a pinch of salt-just as pita has been made for centuries in Middle Eastern kitchens. No shortcuts, just patience and love that yield those iconic puffed pockets and tender crumb.
Q2: Is making pita bread at home difficult?
A2: Not at all! While the idea might seem intimidating, this recipe is crafted to be straightforward. With clear steps and a bit of practice, even novice bakers can master the magic of puffing pita bread right on the stovetop or in the oven.
Q3: How can I ensure my pita bread puffs perfectly?
A3: Pita puffs best when the dough is rolled evenly, not too thick or thin, and baked at a very hot temperature. The steam inside the dough creates the pocket, so make sure your oven or pan is well preheated. Avoid overloading the dough with toppings before baking to keep that puff intact.
Q4: Can I make the dough ahead of time?
A4: Absolutely! Pita dough benefits from an overnight rest in the fridge, which deepens the flavor and makes it easier to handle. Just bring it back to room temperature before shaping and baking.
Q5: What variations can I try with this basic pita recipe?
A5: Once you have the basics down, you can experiment! Add herbs like za’atar or rosemary to the dough for a fragrant twist, sprinkle sesame or nigella seeds on top for an extra crunch, or even make mini pitas for bite-sized delights.
Q6: How should I store homemade pita bread?
A6: Fresh pita is best enjoyed the day it’s made, but you can keep leftovers in an airtight container or ziplock bag at room temperature for a couple of days. For longer storage, freeze them flat and reheat briefly in a warm pan or oven to revive that soft, pillowy texture.
Q7: What dishes pair best with homemade pita bread?
A7: Pita is the ultimate companion! Use it as a pocket for falafel, grilled meats, or fresh veggies. It’s perfect for dipping into hummus, baba ganoush, or tzatziki, and even shines as a side to stews and salads, adding a comforting, chewy bite.
Q8: Can I make this recipe gluten-free?
A8: Traditional pita relies on gluten for its stretchy texture, so gluten-free pitas require alternative flours and binding agents. While possible, it’s more advanced and may not achieve the classic puff. If gluten is a concern, look for specialized gluten-free recipes designed for pita bread.
Q9: What is the secret to that soft, tender crumb inside the pita?
A9: The secret lies in the hydration of the dough and adequate kneading. A slightly sticky, well-kneaded dough traps air bubbles that bake into the soft interior. Letting the dough rest also relaxes the gluten, ensuring tenderness without toughness.
Q10: Why bake pita bread instead of buying it?
A10: Homemade pita offers unbeatable freshness, flavor, and pride. You control the ingredients, avoid preservatives, and can customize to your taste. Plus, there’s something deeply satisfying about watching your dough puff into perfect golden pockets-an edible masterpiece born in your own kitchen.
In Retrospect
There you have it-a straightforward, authentic recipe to bring the warmth and charm of homemade pita bread right to your kitchen. With just a few simple ingredients and a bit of patience, you can create these pillowy pockets that are perfect for stuffing, dipping, or simply savoring fresh. Beyond its taste, making pita bread from scratch connects you to centuries of culinary tradition and the comforting ritual of baking. So next time you crave that soft, versatile bread, remember: perfection is just a mixing bowl and rolling pin away. Happy baking!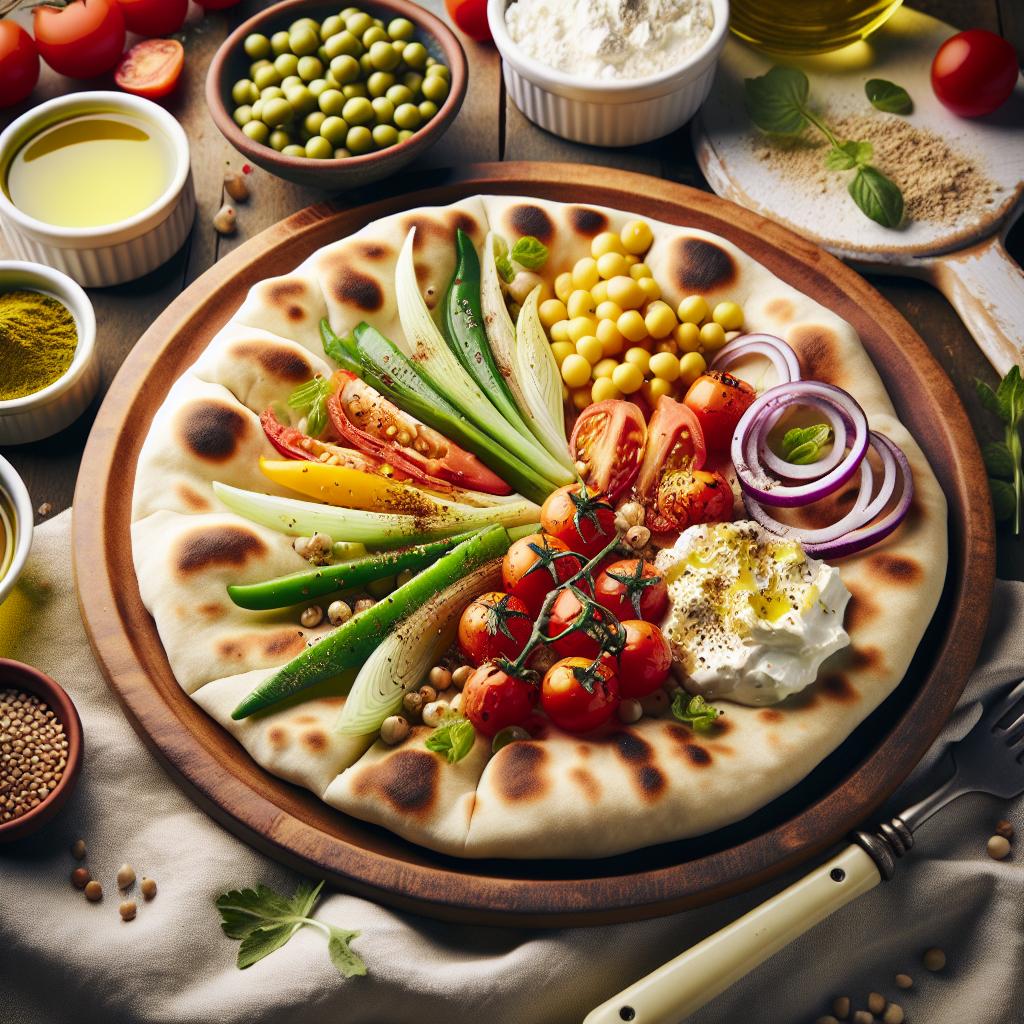


